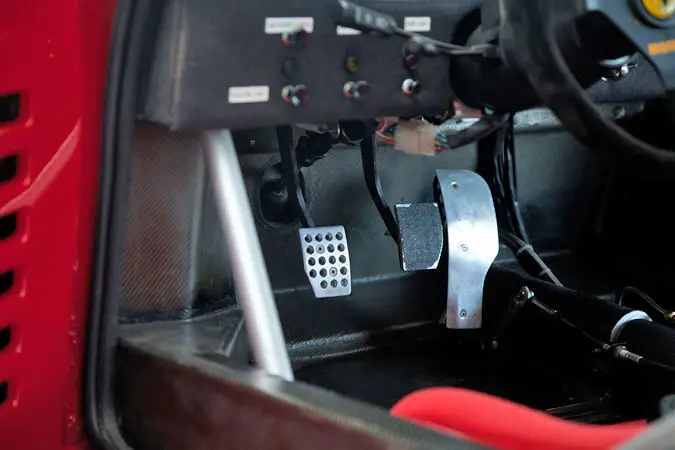
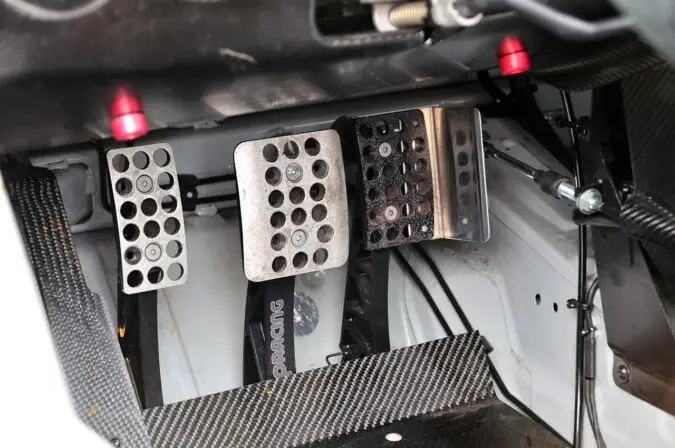
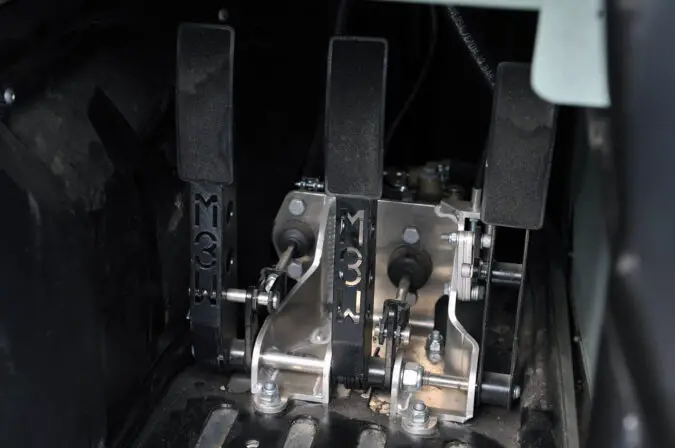
Cars with manual gearboxes are a rarity these days. So much so, that you could pretty much count on one hand the number of three pedaled cars that zoom past you. But despite all this, there are still the enthusiasts out there, who we can count on to preserve the dignity, tactile pleasure, and engagement of a manual box. What isn’t always so clear, unfortunately, is the need for a clutch adjustment.
There’s a good reason why folks still prefer manuals over the convenience and ease of an automatic. It especially wins out against autos as far as driver feel goes. You’re able to more precisely switch to any gear of your choosing, providing you with granular control. That fun factor isn’t so easily replaceable, no matter how fast and sharp modern automatics have been. But what about the clutch pedal?
Barring the gear lever, everything you need to properly control a manual transmission is down to your left foot, and how it dances on the clutch pedal. While it’s better than nothing, there are times when the clutch pedal can feel a bit off. Sometimes, it’s too loose, or there’s too much free play. Even sports cars can have this issue, too. If you’re experiencing this, an urgent clutch adjustment is on the cards.
- How Much Play?
- Consequences
- Slip Vs Drag
- Mechanical Vs Hydraulic
- How To Adjust?
- Self-Adjusting?
- Conversion
- Final Thoughts
How Much Play To The Clutch Pedal For An Adjustment?
When defining the need for a clutch adjustment, we specifically denote adjusting its accuracy and feel. In other words, how much free play it has, on top of its looseness and sponginess when it’s pressed. A ‘free play’ in this instance means the amount of travel between initially pressing on the clutch pedal, until the moment it actually does something. On the contrary, free play is, in fact, a good thing.
There are certainly benefits to it, no doubt. For example, it’s able to provide a margin of error before the clutch begins to actuate. This is great if you’re in the habit of resting your foot on the clutch pedal, or are indecisive about wanting to change gears. On top of that, we also have to consider the fact that components within the transmission get pretty hot. With heat, components begin to expand.
This is the case with your gearbox’s master cylinder, which connects to the clutch pedal. Having a tiny bit of free play ensures that your clutch pedal can compensate for thermal expansion. While at the same time, make sure that the clutch’s master cylinder will release the whole way through once you’ve depressed the pedal. All in all, slight looseness is a core part of the clutch pedal’s design.
In regards to the precise figure for free play, there’s never a fixed amount. It varies wildly depending on the vehicle you drive, and personal preference. A general consensus seems to be that your clutch pedal should be able to be pressed down by 3/4 to 1 inch without much effort. However, others claim that the perfect amount of free play before the clutch engages is around 1cm (less than 1/2 inch).
What Are The Consequences For Not Adjusting The Clutch?
But what if you skimp on a clutch adjustment? Would anything bad happen to your car? While it may not necessarily cause long-term wear and tear or reliability issues with your car, a loose or spongy clutch pedal is culpable for being a nuisance. Having either too much or too little play in the clutch pedal is never a welcomed feeling. Besides the odd feeling you get, it might also have an impact on your driving.
- Too Much Play – When there’s far too much free play in the pedals, there’s a sensation that your car is creeping forwards. You’d notice this when you’re in gear, with the clutch pedal depressed. Rather than staying in place, your car begins to creep and roll ever so slightly forwards or back.
- Too Little Play – When there’s too little free play in the pedals, you’ll find yourself slipping on the clutch way too often. This is an instance where the clutch plate isn’t catching onto the flywheel accurately. It can leave you confused over why you’re in gear, but the car’s not moving at all.
Besides these, there are also other annoyances that you have to deal with when a clutch adjustment is dismissed:
- Makes it harder to ride or moderate the clutch, especially on hill starts or inclines.
- For rookies (those who are new to driving manuals), the risk of stalling is much greater.
- Removes any sense of tactility or precision that comes with a manual gearbox.
- Chances of you missing or skipping a gear increase due to the pedal’s odd feel.
- The clutch might not engage or disengage properly, which accelerates transmission wear.
- May cause the transmission to suddenly pop out of gear while you’re driving.
- You’re likely to grind on the gearbox more, which would cause long-term damage.
What Is Clutch Slip, And How Does It Differ From Drag?
With a clutch pedal that you can’t be sure if you’ve pressed it down right (or not), there’s a heightened likelihood you’ll suffer from either clutch slip or clutch drag. Both relate to the connection between the clutch plate itself, and your car’s flywheel. The latter is a component responsible for smoothening out your engine’s power, before joining up with the clutch, thus passing power onto the transmission.
In detail, slipping and dragging are two separate issues correlating the clutch plate and the flywheel:
- Clutch Slip – This is where the clutch disc isn’t able to catch and latch onto the flywheel properly. Or as we put it in another way, the clutch can’t sufficiently engage with the flywheel. This can result in your failure to swiftly change gears, or the transmission might fail to receive power at all.
- Clutch Drag – Alternatively, this is where the clutch disc isn’t able to release from the flywheel in a very smooth fashion. In other words, the clutch’s inability to disengage from the flywheel. When it happens to you, you immediately notice hard and noisy gear changes, not to mention stalling.
Frequent instances of either clutch slip or drag aren’t ideal for the wellbeing of the transmission. On the surface, it might appear merely like an inconvenience or an unpleasant experience. But inside of your gearbox, slipping and dragging can permanently scar and accelerate damage to the transmission. It inevitably leads to a greater risk of you needing significant gearbox repairs or rebuilds down the line.
How Do Mechanical And Hydraulic Clutches Compare?
It’s worthwhile learning of the differences between a mechanical and a hydraulic clutch, as they have different methods for a clutch adjustment. Modern cars tend to feature a hydraulic clutch, which is theoretically “self-adjusting”. Meanwhile, older cars (pre-1990s) tend to feature a mechanical clutch, where cables are used the link the clutch pedal and the clutch itself.
Elsewhere, here’s how they work:
- Mechanical Clutch – A steel cable connects the (clutch) pedal straight through to the clutch assembly. When you press the clutch pedal, it actuates a clutch fork, which subsequently activates the throwout bearing. In doing so, it disengages the clutch plate, enabling you to freely change gears. Folks tend to prefer mechanical clutches for the connected and engaging feeling, owing to its direct linkage.
- Hydraulic Clutch – In this instance, pressing the (clutch) pedal pressurizes the clutch’s master cylinder. Hydraulic pressure is created thanks to a clutch fluid, which is the same as brake fluids. With pressure being created, the master cylinder transmits it to the slave cylinder. From there, it actuates the clutch fork (like a mechanical clutch), moving the clutch release bearing, thus disengaging the clutch.
For the most part, hydraulic clutches are easier to operate, with minimal force required to press down on the clutch pedal. Although maintaining them can be more complicated and pricier, they don’t need frequent clutch adjustments. On the other hand, mechanical clutches get unadjusted pretty easily, as well as require more muscle to operate them. Still, it’s a much simpler system to take care of.
How Can You Undertake A (Mechanical) Clutch Adjustment?
If you’re tired of that spongy feeling in your clutch pedal, then worry not! Clutch adjustments aren’t a new concept, which has allowed many to refine the entire process. Plus, some automakers are also open to the thought that eventually, you’ll need a clutch adjustment. So, they’ve made it easier. In all, clutch adjustments are quite easy, and it’s recommended that you do this every 6,000 miles or so.
This is usually done as a part of your car’s regular servicing and maintenance. If you’re wondering why a clutch adjustment is even necessary, you can point fingers at your transmission itself. Gradually, any wear on your gearbox’s pressure and friction plates, as well as the clutch linkages, can slowly alter the pedal feel. Over time, the level of play and travel that the pedal has will begin to become misaligned.
This can all be resolved simply with a clutch adjustment. For this, we’ll cover both mechanical, as well as hydraulic clutches. We’ll first begin with a mechanical clutch (hydraulics in just a moment)…
Step 1: Inspect How Much Free Play There Is In The Clutch To Adjust
First, it’s highly suggested that you prepare a detailed service manual, specific to the make and model of your car, to refer to. The techniques on how to perform a clutch adjustment may differ greatly from one car to the next. Even if they all have a similar, mechanical clutch unit.
For example, some automakers recommend calculating the clearance of the clutch linkage. It could be done either from underneath the car or somewhere under the hood. Whereas on most cars, a process like this doesn’t apply. So, be sure to do your homework on clutch adjustments for your car.
Otherwise, it generally rhymes with a familiar process:
- Grab a tape measure or a ruler. Either works, so long as you have precise increments and readings.
- Place the tape measure or ruler next to the clutch pedal.
- Ensure that one end of it is placed towards the floor and is resting on it.
- Remember to angle and align the ruler or tape measure based on which direction the clutch pedal will travel and sink into.
- Note down the default distance between the top of the clutch pedal, and your car’s floor.
- Now, use your hand to gently press down on the clutch pedal. Keep pushing down until you no longer feel any free play.
- You can then write down the distance between the top of the pedal and the floors, with the pedal pressed down.
- Finally, subtract this distance from the default measurement. This then gives you how much free play there is in the pedal.
Step 2: Adjust Your Clutch’s Linkages
The next step revolves around adjusting your clutch linkages. First, you’ll have to locate them, hence why a repair manual will be quite handy. Typically, you’re able to find them at:
- Under your car, close to where the pedal box is.
- Under the hood, nearer to the back, close to the bottom edge of the firewall.
- At the bottom of the clutch cable, which is accessible from the pedal box.
- Underneath the dashboard, on the driver’s side, and close to the steering column.
As you’re adjusting the free play and pedal travel, it may require you to twist a nut or fastener. This is usually placed under the clutch pedal, or by the linkages. For the latter, you’ll have to look at the push rod that’s attached to the clutch fork. Try to find a similarly threaded nut or fastener.
Once you’ve found that, you can proceed with the clutch adjustment:
- First, you’ll have to loosen the aforementioned nuts or fasteners.
- If you want to increase the amount of free play (to solve pedals with minimal travel), you could try to lessen the push rod’s effective length.
- If you want to decrease the amount of free play (to solve pedals with excessive travel), you can try to extend the push rod’s effective length.
- Refer to your manual as to how you can proceed with adjusting these.
- Meanwhile, remember the pedal travel measurements that you jotted down earlier. That’ll give you an idea of how much to shorten or lengthen the push rods by.
- Once you’re done adjusting the linkages, remember to add lubrication to the system.
Step 3: Adjust Your Clutch’s Cables
With the entire linkage assembly and mechanism out of the way, you can now focus on the cables. Go back to your service manual, and find out where the adjuster nut, housing adjusting nut, as well as locknut (aka the wingnuts) are located. Commonly, it’s found attached to the clutch pedal.
When you’ve discovered that, you can begin to proceed with final adjustments to the clutch:
- Loosen the abovementioned nuts, near the end of the clutch cables.
- If you want to increase the amount of free play (for pedals with minimal travel), you can twist the nut to shorten the cable housing.
- If you want to decrease the amount of free play (for pedals with excessive travel), you can twist the nut to extend the cable housing.
And that should do it for a mechanical clutch adjustment! While you’re doing all this, repeatedly test the pedal travel, like in Step 1, and calibrate the linkages and cables where necessary. Always have a service manual on hand, as it can massively expedite and ease this process.
How About A (Hydraulic) Clutch Adjustment?
As we hinted at earlier, most hydraulic clutches classify themselves as “self-adjusting”. Thus, they can adjust the degree of free play in the pedals in real-time, based on a set threshold. It should supposedly mark the end of manual clutch adjustments. However, even they too aren’t always perfect.
Or, perhaps you want to re-adjust its boundaries to something more comfortable for you? If that’s the case, you can begin by measuring the pedal travel, as we did earlier. Get a detailed service manual, as we now begin with the next steps of adjusting the clutch:
https://www.youtube.com/watch?v=2zW2TQ3asVE
- Find the adjuster nut. This should be located either on the clutch fork’s push rod or the master cylinder push rod.
- Then, you can loosen this locknut (aka wingnut).
- If you want to increase the amount of travel (for pedals with minimal free play), you can twist the nut to shorten the length of the push rod.
- If you want to decrease the amount of travel (for pedals with excessive free play), you can twist the nut to extend the length of the push rod.
- Last but not least, remember to retighten the locknut.
And there you have it, how to adjust a hydraulic clutch. As you can see, it’s far easier than adjusting a mechanical clutch, albeit the entire process differs from one car to the next. Even for rookies or those that don’t have a significant mechanical skill, it’s a relatively straightforward process.
Option 2: Using The Clutch Self Adjustment System, Instead
Aha, but there’s an even easier way to proceed with a hydraulic clutch adjustment. This would simply be to leverage the “self-adjusting” properties that it’s already been engineered with. With the engine turned off, and your parking brake activated, you can start by:
- Position your toes or the tip of your shoes underneath the clutch pedal.
- Now, lift the pedal all the way up, and towards you.
- With the pedal in the fully-up position, this will activate its self-adjustment mechanism. You’ll notice how the clutch pedal now sits much higher than it usually does.
- Next, push the pedal down, as you normally would, and change into gears. Keep repeating this with as many gear changes as you see fit, but only a few should be enough.
- While you’re continually changing gears, pay close attention to how far the clutch pedal sinks into the floorboard before it lets you change gears.
It should adjust automatically, mitigating any free play that may have developed over time. If it didn’t work, and there’s still too much or too little free play, then you’ll have to get a manual adjustment. Go back to our earlier option, and perform that one instead.
How About A Conversion From A Mechanical To Hydraulic Clutch?
Whether it’s just for feel, convenience, or ease of maintenance, there is an abundance of brands out there who make conversion kits. In particular, kits which enable you to transition from an old-school mechanical clutch to a fancier and modern hydraulic clutch. You can find quite a lot of these selling at around $500, so they’re not terribly expensive or bad value. Installing them, however, is another story.
Clutch conversions are tough, even for experienced mechanics and DIYers. It’ll vary significantly based on the make and model of your vehicle, what transmission you have, and that kit you’ve just bought. The entire process will require some ingenuity, especially since you have additional parts to mount, as is the case with hydraulic clutches. Remember about the master and slave cylinders we spoke of?
Plus, you’ll have to jerry-rig the clutch fluid reservoir in there, too. But if you’re ever curious, here’s a very brief and condensed step-by-step of how to perform a mechanical-to-hydraulic clutch conversion:
- Disassemble the entire (mechanical) clutch assembly, including the linkages and cables.
- Drill a hole through your car’s firewall or bulkhead, which is necessary to mount and run the master cylinder.
- On the other end, you’ll have to mount the slave cylinder.
- Then, you can proceed to run and join together the hydraulic lines between the master and slave cylinders.
- Install the ‘clutch fluid’ reservoir, usually by screwing it on top of the master cylinder.
- Add in and bleed the clutch fluid, making sure that there’s hydraulic pressure with no air bubbles present.
- Test the clutch pedal feel, movement, and inspect if there’s any play.
Car Clutch Adjustment Facts:
- The clutch needs the correct amount of play in the linkage to work efficiently
- Too little clearance in the clutch linkage results in clutch slip, burned-out friction plate, and ruined pressure plate
- Too much clearance in the clutch linkage leads to clutch drag and difficulties in heavy traffic
- The clutch linkage needs to be checked and adjusted every 6,000 miles or 10,000 km, or as specified in the maker’s service schedule
- Adjustment for clearance in the linkage is made by increasing or decreasing the lengths of the inner and outer cables in relation to each other
- Mechanical clutch-linkage clearance is measured and adjusted underneath the car or at the pedal depending on the car’s make
- Most modern cars have a diaphragm-spring clutch operated either mechanically or hydraulically
- In an emergency, as long as there is play in the linkage, the clutch should perform well enough
- On some cars, many Hondas and Toyotas for example, checking and adjustment can be done at the bulkhead under the bonnet
- Clutch adjustment on a transverse engine can be done under the bonnet, and transverse engines have hydraulic clutches
Final Thoughts On Clutch Adjustments
That just about wraps up our look at clutch adjustments. In all, they’re an essential part of owning any manual vehicle. With use and abuse, combined with age, the clutch pedal can go out of whack. It’ll be misaligned, leading to a build-up of free play. Or in some cases, too little free play. Neither is an ideal scenario, although most do agree that too much free play is more tolerable than not enough.
The good news is that a clutch adjustment is always there to get it back in line. It doesn’t matter that you’re dealing with either a mechanical clutch or a hydraulic one. On the spectrum of DIY repairs, these are among the easier ones. They can, at times, require a moderate amount of skill. But if you get your car serviced at least once every 6,000 miles, then that should’ve been taken care of already.

