A u-joint begins to make noise when it wears out. The most typical bad u joints sound include a squeaking sound, a humming sound, and a clanging sound.
You need to replace your u-joints right away if you hear a clunking or vibrating noise. So, read along to learn more about replacing and troubleshooting u-joints.
Usually, the vibration and clunking sound appear after the u-joint has failed. When this happens, the u-joints should be examined and, if necessary, replaced.
It is advised that both joints be changed at the same time because most driveshafts have two joints.
U-joint failure brought on by inadequate lubrication may begin with a squeaky sound. You might also question if your u-joints have failed if you hear this sound.
- U Joint
- U Joint Replacement
- U Joint Cost
- Bad U Joint Sound
- Universal Joints Problems
- Frequently Asked Questions
U Joint
If you’ve been driving for a while, you’ve probably heard the term “universal joint” used by a mechanic or do-it-yourselfer.
They’ll frequently say, I think it’s a universal joint, or The u-joints are going bad, along with the name of this mechanical component in an automobile.
In spite of this, when you hear something like this, you naturally want to know what a universal joint on an automobile is.
The solution is crucial because certain kinds of vehicles cannot move at all in the absence of functional universal joints.
Furthermore, knowing how to use and maintain u-joints correctly might spare you from a hefty repair charge, which is something we’d all like to avoid.
When left unchecked, U-joint failure can be expensive to repair or even dangerous while you’re driving. It usually occurs gradually.
The good news is that there are obvious symptoms that your u-joints require expert care.
What Is A Universal Joint
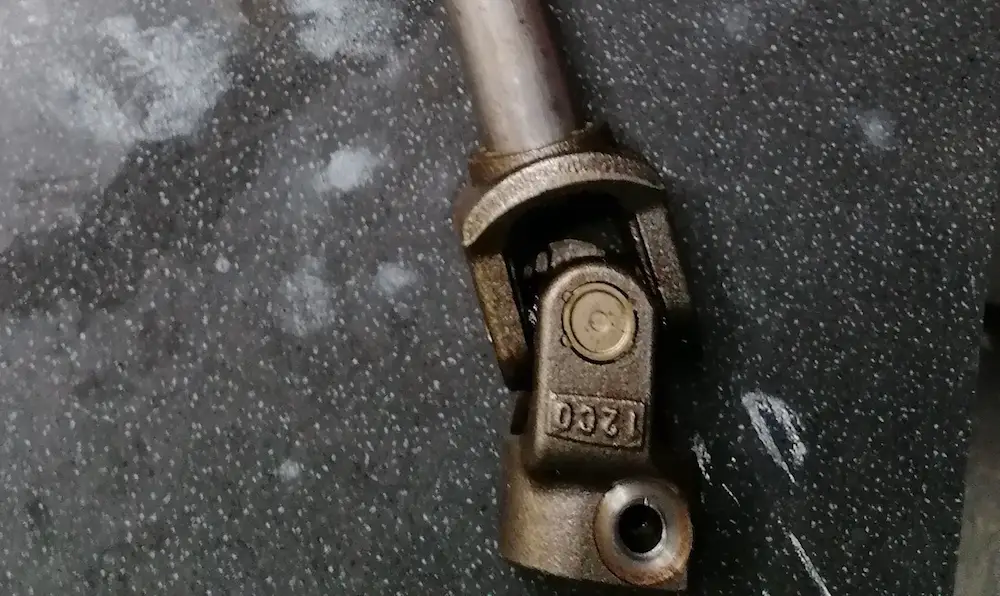
The rigid driveshaft of the car may connect to the transmission and freely rotate thanks to universal joints, which are X-shaped components that are normally constructed of steel with bearing caps at either end.
They are a component of the system that allows a rear-wheel-drive vehicle’s engine’s rotating crankshaft to transmit that rotating motion to the back wheels.
They give the driveshaft’s ends a flexible connection, allowing the driveshaft to move up and down and at an angle to the engine as the car travels over inclines in the road.
For instance, the driveshafts of pickup trucks contain universal joints at both ends.
The u-joints typically attach to yokes that permit the fore-and-aft movement of a driveshaft as well as the up-and-down movement for which the universal joints are designed to compensate.
It would be difficult for a vehicle to have a suspension that delivers any significant wheel travel without universal joints or a system similar to them. Whenever there was a bump or pothole, the driveline would bind.
Constant velocity joints, or CV joints, are used in front-wheel-drive cars. They serve the same purpose as universal joints.
What Is The Role Of A U Joint
Driveshafts must be able to move up and down with the suspension while continuing to rotate to enable uninterrupted power delivery to the drive wheels because cars don’t travel on surfaces as flat as a billiard table.
The driveshaft can still turn while this movement is made possible by the universal joints. U-joints compensate for the rear axle’s height mismatch with the transmission when driving the rear wheels.
A driveshaft that runs from the engine straight and directly to the axle will flex or bind as the car travels over bumps because a car’s rear axle as well as rear wheels move independently of other parts of the car.
The driveshaft maintains free rotation thanks to the u-joints’ compensation for that motion. The flexible “universal” action of the u-joints automatically corrects misalignment as the driveshaft rotates.
What Kind Of Maintenance Is Required
The universal joints in the car obviously work hard whenever the car is moving. That workout increases when the car travels quicker and its rear axle moves up and down more frequently.
This implies that it’s crucial to maintain u-joints.
Each u-bearings joint’s lubricated at the manufacturing facility during assembly. Some are “lubed for life,” meaning that more lubrication cannot be used to maintain them.
Grease fittings on other universal joints enable the addition of grease as necessary.
In either case, the lubrication can deteriorate over time, and the “dry” bearing leads to metal-on-metal contact, which causes wear.
A grease fitting can be used to lubricate universal joints, but u-joints without that capability will simply wear out and require replacement. Fortunately, they have a very long service life.
U Joint Replacement
Step 1
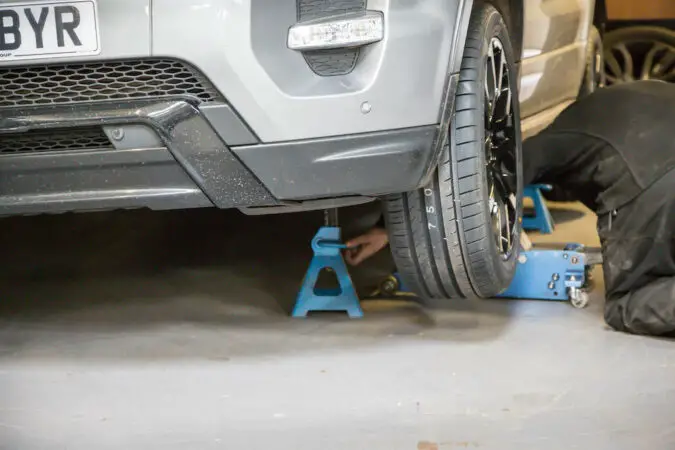
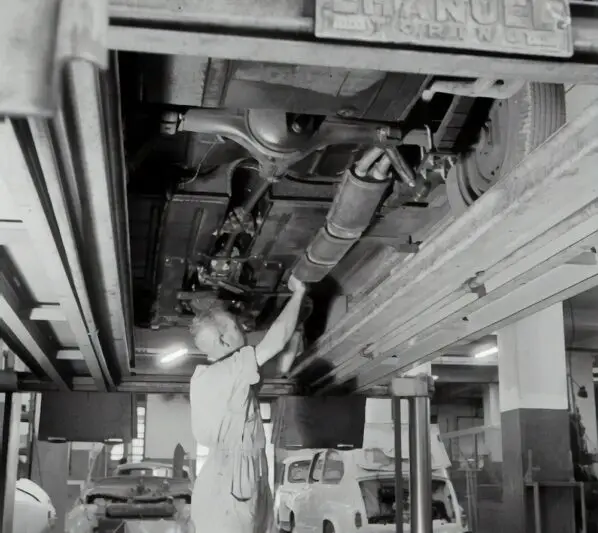
In order to remove the driveshaft, the automobile must be in the air, either level or with the rear elevated over the front to prevent transmission fluid leakage.
Depending on the year, make, and model of your car, the back yoke fastens to the yoke on the differential using two nuts as well as bolts or even four bolts. Typically, they are either 7/16- or 1/2-inch wide. The driveshaft can be taken out by pushing it forward, then lowering it, then drawing it backward.
Step 2
By tapping the yoke with a hammer, the tension on the C-clip/snap ring can be released. Depending on the type employed, different directions of tension are given to the snap rings.
Strike the yoke forcefully while holding up the U-joint components via the U-joint cups. Remove the outer snap ring also known as a C-clip out of the lower cup or the inside snap ring from the upper half of the yoke with a pair of pliers. Repeat this step with the opposite side to remove both C-clips/snap rings.
Step 3
In the yoke, press the bearing cups out. You can use a press, a hammer, and punch, or a powerful socket for this. Driveshaft/yoke rotation should be 180 degrees, then repeated on the opposing side.
PRO TIP: The bearing cups may be pressed into some heavy-duty yokes on both sides. Repeat steps 2 and 3 above for the second yoke if this applies to you. You must handle the driveshaft with extreme caution at every stage of the procedure. The driveshaft is made of very light-gauge metal to conserve weight, which makes it easy to damage and can throw the driveshaft out of balance. A completely new source of vibration and a new set of issues will arise if your driveshaft is out of balance.
Step 4
Remove the other two cups carefully, fasten two opposing cups to the new U-joint with a rubber band or piece of tape, and then insert the polished ends of the U-joint into the yoke apertures.
One of these apertures should have a bearing cup underneath it. Seat the cup by tapping the yoke. Install the C-clip or snap ring after the cup is straight and positioned in the yoke, then hammer the yoke into place. Repeat at the other location.
Step 5
Check for binding in the installed U-joint. To release this bond, you might have to “touch” it into position.
Step 6
The driveshaft’s transmission end should be inserted into the transmission’s tailshaft until it bottoms out by sliding underneath the vehicle. Move to the differential side and arrange the driveshaft’s tail there.
Step 7
Set the cups of the U-joint and connect to the pinion yoke that is on the differential after removing the tape or rubber band. Tighten the nuts and bolts after installing the U-joint clamps allowing the U-joint to connect to the pinion yoke. To secure these cups in position, attach the C-clips or snap rings.
Step 8
Start the car, lower it to the ground, and listen for any clunking coming from the driveshaft or U-joints.
Step 9
Mark the side of the driveshaft and yoke where you will place the replacement U-joint. By doing this, you can be confident that the driveshaft will go in without any unbalance. Lay the driveshaft on a workbench or other suitable workspace after removing it.
Step 10
Locate the press cup of the proper size to suit the driveshaft yoke, and then position the cup over the threaded rod’s end. After that, choose a different cup that is bigger than the ones on the U-joint but not bigger than the opening on the yoke.
Step 11
Use the hand to ensure the threaded rod is tight while positioning the tool against the yoke. Take out the C-clips or snap rings holding the caps to the yoke. It might be necessary to use the press to release the tension on one clip before turning it around to remove the other.
Step 12
You can remove one cap from the yoke by continuing to tighten the threaded rod. To remove the other cap and U-joint “cross,” turn the tool around and repeat the process. This procedure can be a little bit simpler if the cross is perpendicular to the yoke.
Step 13
You should tape two opposing caps on the new joint to keep them from coming off during installation. Many people think this is unnecessary, but they start to think otherwise after the first time a cap comes off during installation and needle bearings start flying everywhere. You can prevent that with tape.
Step 14
Embrace the yoke with the cross. Push the new cap as deep into the yoke as you can by sliding it as much to one side as you can. Set up the tool so that the threaded rod end is up against the cap as you push it in.
Step 15
Drive the cap into the yoke by applying pressure to the threaded rod. Once both caps are firmly fitted, remove and flip the tool, then repeat on the other side. You can then install the C-clips or snap rings to secure the caps in place. Verify how readily the joint pivots.
Step 16
Slide over the transmission yoke and connect to the tail shaft from underneath the car until it bottoms out. Making sure to match up the marks you made during removal, lift the back of the shaft into position and install the straps or bolt the flanges together.
U Joint Replacement Cost
A U-joint replacement typically costs roughly $250. Depending on the type and model and where you live, it might cost anywhere from $200 and $300.
Parts cost between $30 and $150, with labor making up the remainder. However, rear U-joints are likely to present in two or possibly three rear-wheel-drive trucks, which can bring up expenses to about $350.
Even though a truck U-joint is easier to replace than a car U-joint—and you’re more likely to need to replace more than one U-joint—it can still be challenging to perform without a lift.
Bad U Joints Sound: Factors Affecting U-Joint Replacement Costs
When replacing your U-joint, the following price factors will be the most important:
1. Model And Make Of Vehicle
The make and model of your car affect accessibility, part prices, and even part availability. This indicates that it has a variety of effects on the price of your replacement.
For instance, you should prepare to spend extra for the parts if your vehicle is less popular because they are more difficult to obtain. Because the mechanic might not know exactly how to perform the operation, you’ll also spend more on labor.
However, the price of OEM parts is another important consideration. For instance, if you want to repair both bearings, the OEM parts for some vehicles might cost upwards of several hundred dollars.
An OEM U-joint should typically cost between $150 and $200 when purchased new, and this price is consistent for the majority of automobiles.
2. U-Joint Placement And Number
The quantity of universal joints varies across different types of vehicles. For instance, there is usually only one in cars. Contrarily, the majority of pickups will have two, sometimes three.
Additionally, since the car has more U-joints, each one takes more stress and is therefore more likely to fail. As a result, drivers of rear-wheel drive cars are more likely to experience U-joint problems.
Additionally, the majority of U-joints that connect the transmission to the drive shaft are positioned in the center of the car or right underneath the cabin.
The drive shaft can move with the car’s body thanks to these joints. They also take into consideration the height difference between the axle and the transmission.
3. Aftermarket U-Joints
Choosing an aftermarket universal joint component will always result in cost savings. You have the option of selecting made to fit, which means the component will fit that vehicle.
A universal fit option allows you to select a part that will work with practically any vehicle. Before making a purchase, it’s crucial to determine whether your joint is has a U or X shape because there are distinctions between the two.
Last but not least, you might choose used or remanufactured components to save money.
The majority of U-joints are inexpensive enough that this won’t be a major issue, but you can reduce the price to a tenth of the price of an original equipment part.
For instance, all of the components in the pricing range at the low end of the graph above are aftermarket or remanufactured components.
4. Mechanic’s Labor Rate
The price charged by your mechanic will probably have the biggest impact on how much it will cost to replace your U-joints. This is due to the fact that replacing the joints takes 1-2 hours.
You may expect to pay about $140 if your technician bills at the national average rate of $60 per hour plus a 20% shop fee.
Bad U Joint Sound
U-joints are mostly employed in driveshafts, though they can occasionally be found in other applications (also known as propeller shafts). Driveshafts are used by all cars, with the exception of those with front-wheel drive, to transmit rotational force from the gearbox (or transfer case) to the differential(s).
The majority of driveshafts contain one or more u-joints. The driveshaft can move up and down in reaction to modifications in the vehicle’s suspension geometry thanks to the u-joints.
A conventional u-joint comprises four cups with needle bearings as well as a cross-shaped middle component.
The grease in the cups also serves to lubricate the needle bearings. Greasing u-joints that are serviceable, and have grease fittings, on a regular basis will increase their lifespan.
Numerous factors, such as lack of lubrication, corrosion, and normal wear and tear, can cause U-joints to fail. One or more of the symptoms listed below will probably become apparent when a u-joint begins to fail:
Bad U Joints Sound, Symptoms #1 – Vibrations
A vibration that is throughout the entire vehicle is among the most typical symptoms of a faulty u-joint. At high speeds, this is when the vibrations are typically the most pronounced.
Bad U Joints Sound, Symptoms #2 – Squeaking Or Clicking Sounds
What noise does a defective u-joint make? An unlubricated or damaged u-joint will usually produce a clicking or squealing sound. This noise won’t directly correspond to the normal speed of the tires since a normal driveshaft rotates around 3X faster than the wheels.
Bad U Joints Sound, Symptoms #3 – A Clunking Noise
Clunking noise may also be due to worn u-joints. When shifting gears or quickly accelerating or decelerating, you may hear the bad u joints sound. When shifting an automatic transmission out of the park or between forward and reverse, the noise is frequently the loudest.
Universal Joints Problems
There will be certain signs that universal joints are deteriorating. You can probably avoid having to have your automobile towed to a repair shop if you recognize these warning signs of a faulty U joint.
Bad U Joints Sound, Common Problems #1 – Squeaking Sounds
When you start the engine again after stopping, does your car squeak? When the car accelerates past 5 to 10 mph, it no longer exists. It only becomes apparent when the car travels forward or into reverse.
Simply lubricating the joints will take care of this problem.
What causes this to occur? The manufacturer lubricates the bearing parts of the universal joints. Now, over time, this lubricant may run out or evaporate.
The driveshaft causes the bearings to slightly twist with each rotation. Dry bearings thus result in metal-to-metal contact, and too much friction causes corrosion and squeaky sounds.
The bad u joints sound serves as a warning to have a qualified mechanic inspect and maintain the universal joints. Regular maintenance will increase the joints’ lifespan and prevent the driveshaft from breaking down.
Bad U Joints Sound, Common Problems #2 – A Clunking Noise
Clunking is a bad u joints sound warning of a damaged universal joint, especially if you hear them as you put the car in reverse.
When you reverse the power, the driveshaft rotates a little before abruptly stopping, which is why there is a clunking sound.
This can just be the progression of squeaks due to inadequate grease levels in the bearings. At this point, some harm has already been done that you cannot repair, but maintenance will unquestionably reduce the damage.
Bad U Joints Sound, Common Problems #3 – Vibrations As You Accelerate
Another bad u joints sound occurs when you speed the car, you will feel a severe vibration throughout the vehicle. This is the next stage of clunky bearings. This happens as a result of the driveshaft’s uneven movement.
When the bearings are so worn-out that they can no longer control the movement of the driveshaft and the grease dries up. That vibration is a result of its deviance from its normal rotational path.
Are you familiar with the trembling that unbalanced wheels produce? The fact that a driveshaft rotates at least three times faster than the wheels causes the frequency of this vibration to be higher.
This sign indicates that the U-joint is now impacting other parts, such as the transmission. In order to stop additional damage, this calls for a diagnosis and repair job.
Bad U Joints Sound, Common Problems #4 – Leaking Transmission Fluid
There are various reasons why this fluid leaks, and poor U-joints are one of them. When the leak happens in the transmission’s back, you can be certain of it.
If you ignore the vibrations, the unstable drive shaft rotations will probably cause the transmission’s output shaft seal and tail shaft bushing to wear out, which will result in fluid leakage.
When this occurs, thoroughly inspect the transmission to identify the leak’s origin and implement repairs.
Bad U Joints Sound, Common Problems #5 – The Vehicle Doesn’t Drive
The failure of U-joints ends here. It’s possible that you’ve already seen a car parked on the side of the road with its driveshaft below.
It indicates that the driveshaft literally disintegrates and separates from the transmission or rear axle. At this point, repairs can necessitate replacing the driveshaft and perhaps more.
Bad U Joints Sound, Common Problems #6 – A Broken Drive Shaft
Other times, the U Joint is so faulty that it is unable to join the drive shaft. More specifically, the drive shaft separated after falling off the vehicle. In this case, the replacement of a new drive shaft requires that automobile owners hire a tow truck.
Frequently Asked Questions
How Long Can You Drive With A Bad U Joint
If you suspect that your u-joint may be damaged, you should take immediate action. If a u-joint totally fails, the driveshaft could escape the underside and cause serious damage to the automobile, possibly even an accident.
What Does A Bad U Joint Sound Like
When releasing the brake and applying the accelerator, in particular, a damaged u-joint can make the car jolt or make a loud noise. At high speeds, a faulty u-joint could also cause the vibration to come from the center or back of the car.
What Is A Universal Joint
The vehicle’s rigid driveshaft will connect with the transmission. It will freely rotate as a result of the universal joints. These are components that are normally constructed of steel and have bearing caps located at either end.


